This article will show you How to Create a Subdomain in Windows Plesk
Plesk, a widely used web hosting control panel, simplifies website management tasks, and one essential function is creating subdomains. Subdomains allow you to expand your website’s functionality and organization by creating distinct web addresses that are part of your main domain. In this comprehensive guide, we’ll walk you through the steps to create a subdomain in your Plesk Control Panel. This process is straightforward and can be accomplished with just a few clicks.
Step 1. Log into Plesk

Step 2. Click on Add Subdomain

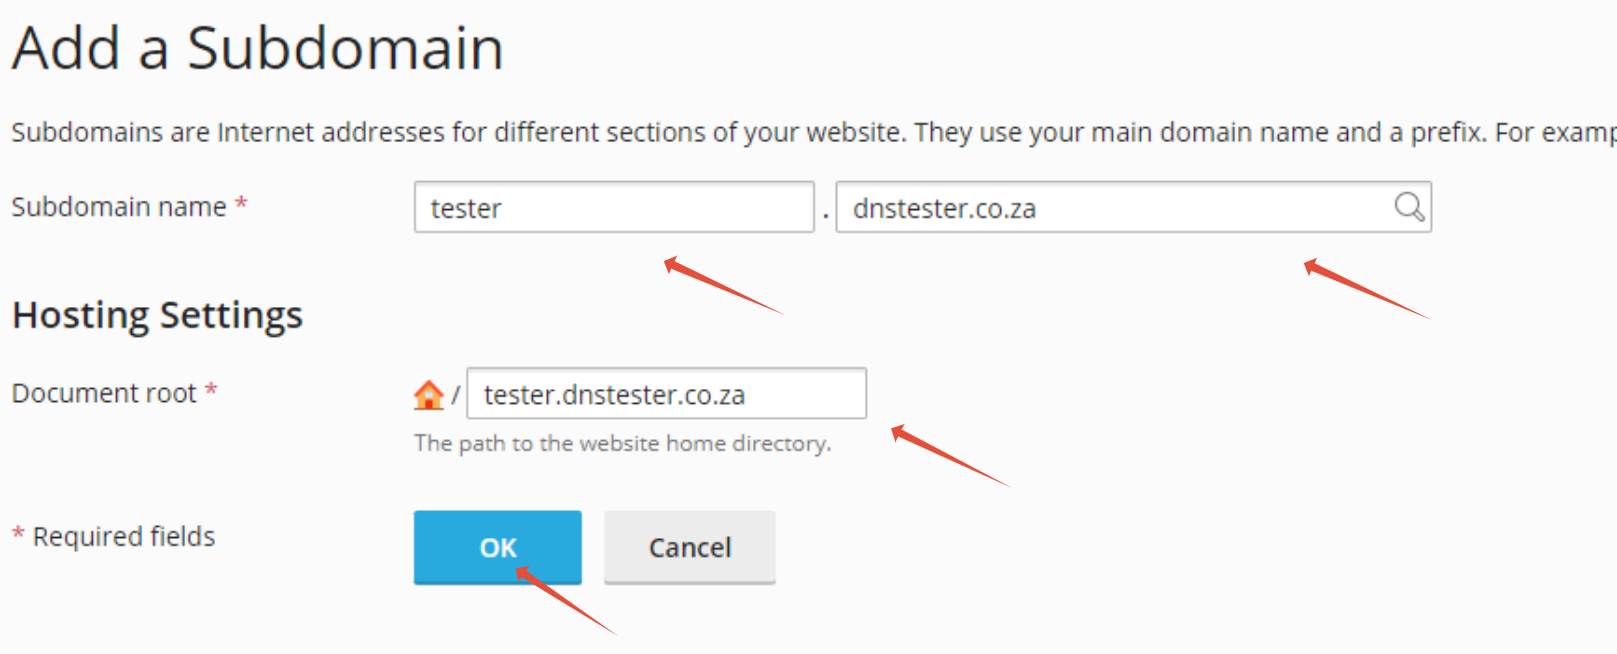
Step 3. Type in the name of the new subdomain in the subdomain name field then click Ok

Step 4. You will find the Subdomain on your Dashboard

Frequently Asked Questions
1. What is the purpose of a subdomain, and when should I create one?
A subdomain serves as a way to create separate sections or functionalities within your website while keeping them connected to your main domain. Subdomains are often used for various purposes, such as creating a blog (blog.yourdomain.com), setting up a shop (shop.yourdomain.com), or hosting specific content or applications. You should consider creating a subdomain when you want to organize your website content or provide distinct web experiences for different sections of your audience.
2. Can I create multiple subdomains under the same main domain?
Yes, you can create multiple subdomains under the same main domain. Plesk Control Panel allows you to add as many subdomains as needed, provided your hosting plan supports it. Each subdomain you create can be configured independently with its own set of settings, such as a separate directory or specific permissions. This flexibility makes Plesk a powerful tool for website administrators looking to expand their online presence and improve website organization.
