Step 1: Find a WordPress Theme
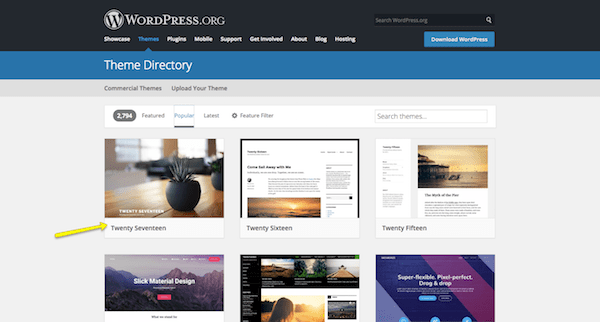
You may be tempted to start combing through the various settings and pages in the WordPress menu, but hold on that for now. The first thing you need to do here is to find a theme for your site.
A WordPress theme is a pre-designed and pre-coded interface template for WordPress. Basically, it saves you the trouble (and money) of having to design your own website from-scratch or to pay someone else to do it for you.
When you log into WordPress for the first time, WordPress will automatically assign their latest theme to your site.

There’s absolutely nothing wrong with using this theme, especially since it’s built by WordPress developers. However, it’s a very basic theme and one that’s not likely going to be useful if you want to do anything more than blog or create a simple site for a local business.

If you want to use a WordPress theme that works better for your niche, don’t be afraid to look around and to find the best and most trustworthy WordPress theme for your purposes.
Keep in mind that every theme requires some configuration. Also, not every theme works the same way. Some utilize a basic text editor (which looks similar to the blank page in Microsoft Word) while others use a page builder or visual editor. So, switching from one theme to another will force you to do a little rework if or when you make a switch. If you want to spare yourself the possible hassle, then don’t move on to the next steps until you’ve found the perfect WordPress theme for your site.
Step 2 : Install Your WordPress Theme
When you find that perfect WordPress theme, it’s time install it in WordPress.
Free WordPress Themes
If you’re using a free theme from the WordPress repository, here is what you need to do:
Inside WordPress, go to the Appearance tab and click on “Themes”.

At the top of the page, click on “Add New”. This will take you to the WordPress repository from within WordPress. Use this option so you don’t have to do any manual installation.
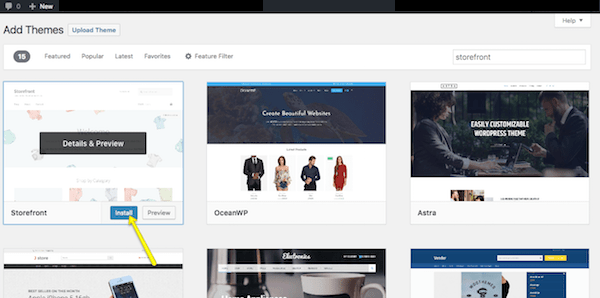
Once you’re in the repository, do a search for the WordPress theme you want to use. Hover over it, and click the “Install” button.

When it’s done installing, you then have to activate it in order to publish it to your WordPress site. Click on “Activate” (in the same spot where the “Install” button was) and wait for it to take you back into the main WordPress dashboard.
Premium WordPress Themes
If you’ve decided to purchase a premium WordPress theme, the process will differ as third-party theme developers and marketplaces don’t sync directly to WordPress. Here is what you need to do:
Go to your WordPress theme’s page and purchase the file. Once you’ve done this, you’ll be taken to a screen where you can download the theme file. It will look something like this:

If there is an option for it, download the “Installable WordPress Files Only”. This will give you a zipped folder you can then upload directly into WordPress.
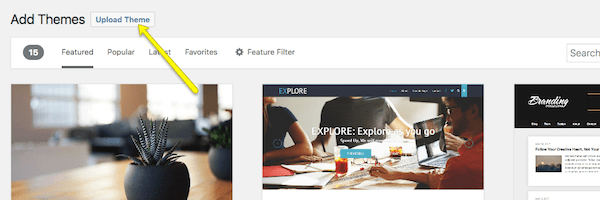
To do this, go back into WordPress, find the Appearance tab, and go to “Themes”. Click on “Add New” at the top. Only, this time, you’ll select the “Upload Theme” option.

Select the zip file from your computer and click Install Now. With your new theme uploaded into WordPress, you can now activate and publish it to the site.
Step 3: Configure Your WordPress Theme
Upon activation, you’ll want to spend some time configuring your theme. You can do this under the Appearance tab and then click “Customize”.

Ultimately, it’s up to you to decide how much or little of your theme you want to customize. However, you should at least take some time now to go through each of the modules and acquaint yourself with what you have the power to change.

Site Identity is an important one to fill in, so make sure you look at that first.
